Saturday, January 26, 2013

Making Satin Pageant Sashes

 pageant sashes 012


My daughter asked me if I would make 12 satin sashes for  awards at my grandson's swim team banquet.
I had never done a pageant sash & I looked all over the internet for instructions & didn't find any, so I took pictures along the way.  I hope this may help someone avoid my mistakes.   
 
I bought cotton or flannel backed satin to use, as it is a little less slippery & has a bit more body to it.  I did NOT pre-wash it, like I usually do ALL my fabrics, right when they come in the door to my house.  This stuff frays something awful & I was afraid it would shrink too much, too.

One tip to prevent fraying of fabric when pre-washing it, is to cut an angle across the corners of the yardage.  This will prevent all those long, tangled strings you sometimes get.  I wasn't taking any chances with this stuff though.

Normally, I starch the "HE-double toothpicks" out of any fabric that I'm cutting, but I found out really quickly that spray starch left water marks on this satin.

I just ironed it with a DRY iron...no steam...at a moderate temperature.  Be sure to check your iron's temperature settings & make note of it, so when you come back on the second or third or fourth or fifth day (yes, these took me THAT LONG to finish them all!!) you won't scorch your fabric by starting out with your iron too hot.   

 
pageant sashes 005

I used both a fusible stabilizer, ironed directly onto the back of the satin fabric as well as a cut-away stabilizer in my embroidery hoop.

pageant sashes 006

Through trial & error, I determined that my embroidery design needed to be approximately 14" down from the top of my fabric, so that it would be positioned correctly on the body.  I measured this prior to placing the fabric in the hoop, so I would leave enough at the top & marked it with just a pin until I got my embroidery hoop attached to my machine.


pageant sashes 001

Not all fonts do well on satin.  This is a script font that is built into my machine, but I read that the font, Perpetua, also works well.

Using my Embird software, I combined the 3 different thread colors of this crown & font into just one color, so as to save time in embroidering.  When you're doing 12 of anything, it takes awhile & this way I didn't have to keep running back to the machine to change threads time after time for each part of the design.


pageant sashes 007

 I found that if I pinned the satin to the stabilizer, all around the hoop, making sure the pins were out of the way of the needle, it helped to keep the satin taut & avoided puckering.  I was pleased that the pins did not leave marks or holes in the satin.

pageant sashes 004

 When finished, I trimmed off both stabilizers from the back & cut the strip of satin on each side of the embroidery design so that there was approximately 1 1/2" on either side of the widest part of my design.  In this case, it was the outer points of the crown.
 pageant sashes 002


This photo, above, just shows my choice of long quilters ruler, not the correct measurement for cutting.  Your measurements for cutting the width of the sash may be different, based on your choice of embroidery design.  Mine were cut 6" wide prior to sewing a 1/2" seam on each side, & ended up 5" wide, finished, but a child's sash might be 3" instead.

Mine looked best with approximately 1 1/2" on either side of the widest part of the embroidery design.

  When cutting the sashes AFTER the embroidery was done, if I folded the embroidered satin fabric more than once, it would scooch all over the place & I was unable to get a nice, straight cut edge. I found that using my 6" wide quilters ruler helped tremendously in cutting the strips. 


pageant sashes 009

Another tip I found useful was to place a second ruler flush against the top & side of my long ruler, so that I could continue my cut in one very straight line.  If I had to move my large quilting ruler upwards to continue cutting, the fabric would move & distort the cut.  That satin is slippery & Very frustrating!

I soon learned that when I cut a very wide piece of fabric with the embroidery design in the midde & tried folding it with right sides together, sewing the long side seam, I had to struggle to turn it.  The stabilizer was especially difficult to turn through the tube & it left my embroidery wrinkled, as it did not want to bend in half nicely without distortion. 

Instead, I cut a back piece of satin the exact size of the front embroidered piece, placed the right sides together, sewed both long sided & across ONE bottom edge.  Turning this right side out seemed to be easier for me.  It also left 2 seams on either side to use as guides for pressing instead of one seam on the back that I would have had to center each time I ironed each sash.

For this embroidered design, my sashes were cut 6" wide AFTER embroidering.  You don't want to cut the fabric first & then try to embroider it, as that would make it difficult to hoop & also it might pucker & pull in from the sides.

I would have loved to have been able to use my serger for this project, since satin frays so much, but even a 3 thread overlock stitch left a thick bump of thread in the seams that showed up horribly when pressing from the front.  Instead, I just sewed at least a 1/2" wide seam.

I found that once I sewed the seams & turned the sashes right side out, if I placed my hand down inside & spread my fingers wide against the inside seams, then slowly pulled my hand back out as I ironed the sash, it would lay nicely & be evenly centered.


pageant sashes 011

 I sewed 2 more pieces of satin for the back sash in the same manner...right sides together, sew down both long edges & across one short side, then turned it right side out.
   For an adult, the sashes needed to be angled at the shoulder so they would lay nicely.  You may not need to do this for a child's size.

IMPORTANT so pay attention:

 Place the 2 sewn sash tubes together, with the embroidered FRONT sash facing upwards, towards you.  (the back piece is the same on both sides, so it doesn't matter which way you lay that one)

 pageant sashes 010

Measure down 1" on the right side of the sashes & make a little mark.  Then angle your ruler from that mark over towards the beginning of the sashes on the left.  Cut through all 4 layers at once!  Keep them pinned together while you carry this to your sewing machine.  You are going to do a French seam here, so you will sew with the back sides (or wrong sides) together FIRST.  This is the opposite way you sew most seams, so pay attention!  Make sure you pin them together before moving them.

Once you've sewn across that top edge, trim it down slightly & fold your sash over so that the embroidery design in now on the INSIDE.  Sew across that same angle again, tucking in the corner edge, if it pokes out a little.  I had a bit of difficulty in getting the tip to stay inside on some of them, so I gave them a touch of fabric glue in that area, for extra security.

I'm sure there is a better way to connect the fronts to the backs but I couldn't wrap my head around it.  The French seam worked well for me, but if others have some suggestions, I look forward to hearing them.


  pageant sashes 012

Press them all with a moderate iron.  I tried not to stress about some of the wrinkles & convinced myself that it was just the nature of the satin.

They looked great on these sweetheart swimmers & they seemed pleased!

   
Sweetheart Senior Sashes 

 Forgive me for covering their pretty smiles, but I would never put a photo of a child's face on the internet.
(Someday soon, I'll do a post on exactly why not) 

I know this was a long & detailed post but I hope it helps someone in the future with such a project.  I went through a lot of trial & error on these.

I'm linking up with Yvonne at StoneGable for her
Tidbits, Tips & Tutorials as well as Susan at Between Naps on the Porch for Met Monday.  I hope you visit both these gals blogs because they are a treasure trove of useful ideas!


Tuesday, January 22, 2013

January Snowy Blues


Jan Icey Blue Snowmen Table 023 PM

The PTA of Sandy Hook suggested that we take our extra snow flakes we had made for the new school of the surviving children & create a winter wonderland of our own, in solidarity with them.  I knew immediately what I would do with all the extra free standing lace ones I had made.
(seen HERE)


I created this icy blue tablescape, filled with snowflakes, snowballs & snowmen.


Jan Icey Blue Snowflakes 4


Silver pinecone tea light holders on either side of the centerpiece, provided warmth & light on a cold winters night as well as some sparkle at the table.

Jan Icey Blue Snowmen Table 029  Jan Icey Blue Snowmen Table 030


  Jan Icey Blue Snowmen Table 011


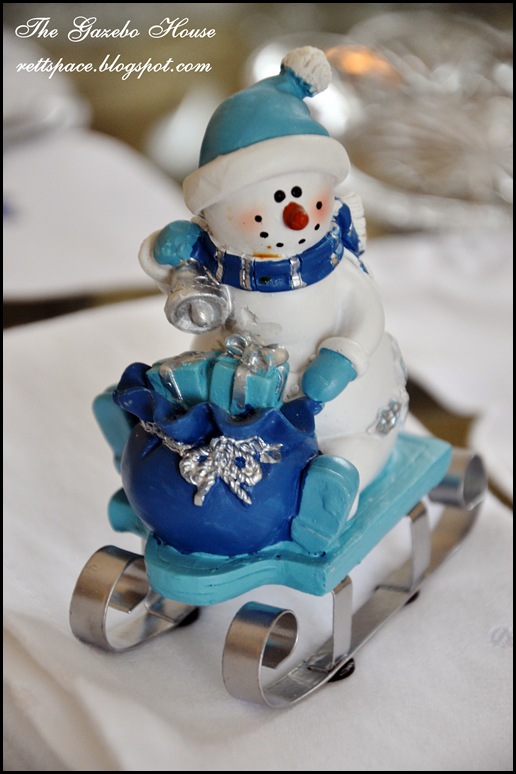
Each place setting included a different snowman on a sled atop a white Waterford "Ballet Dot" napkin, whose dots look a lot like snowballs to me.


The centerpiece began with the pretty cake plate, whose base reminded me of an ice ball.
 Jan Icey Blue Snowmen Table 035

I scattered flat bottomed glass drops all over the glass table, to represent icy water droplets.
 Jan Icey Blue Snowmen Table 037


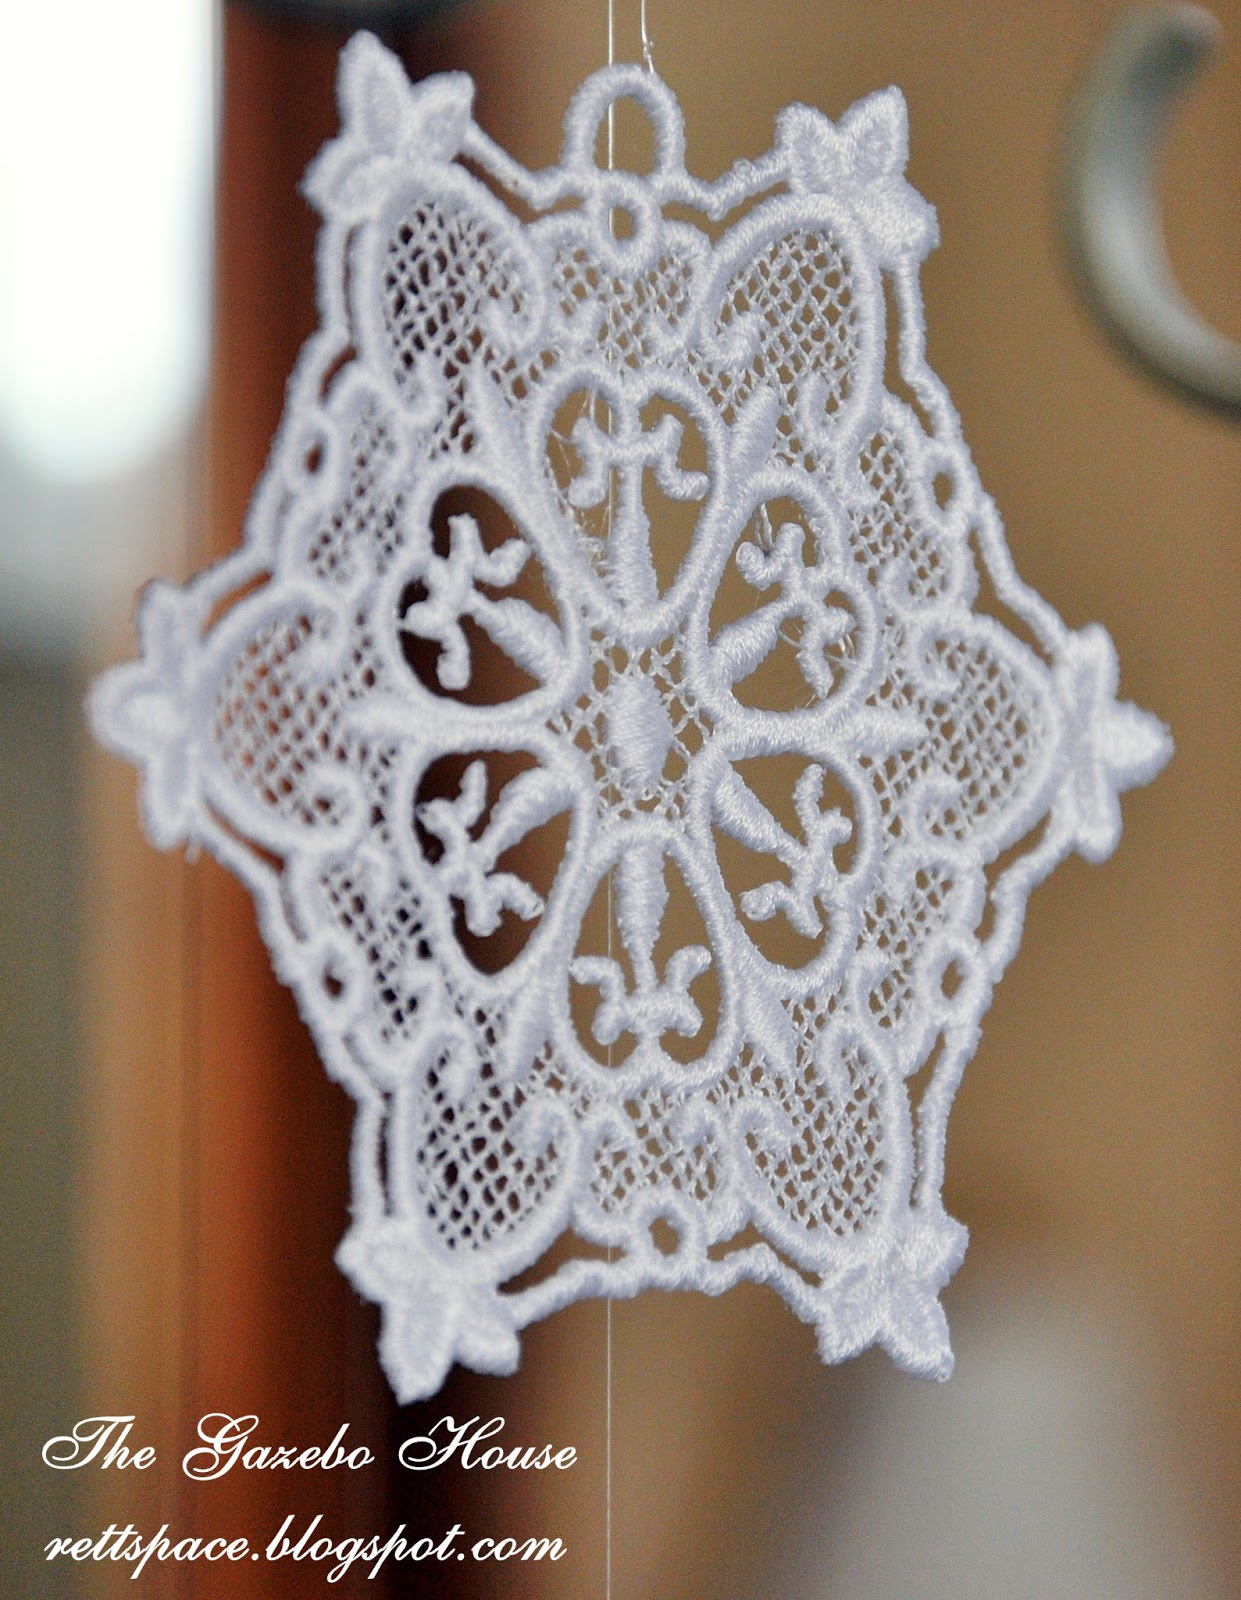
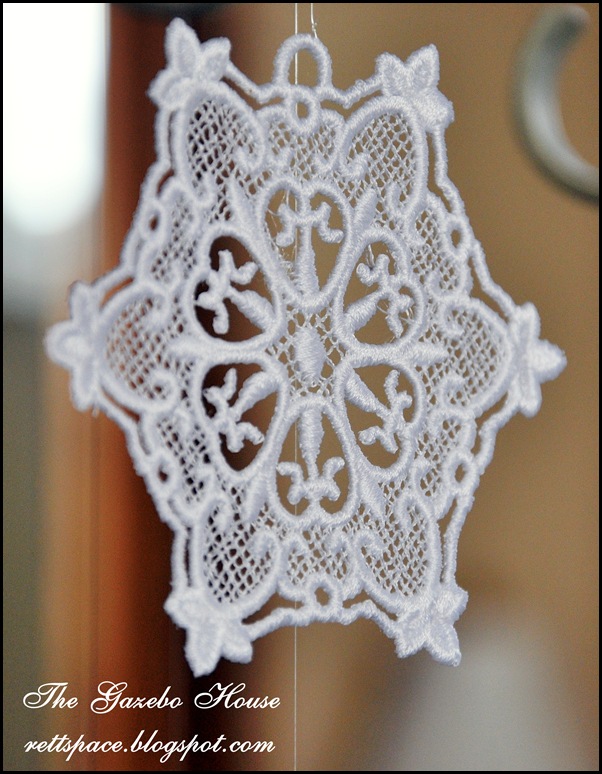
The free standing lace snowflakes were hung from the arms of my chandelier with fine nylon sewing thread.  If you try this method of hanging anything from such a light, may I suggest you tie one item to each end of the clear thread, instead of attaching each snowflake individually.  It makes it much easier to take them down later & you can easily adjust the various heights of the items for a truly random look.

Jan Icey Blue Snowmen Table 003  Jan Icey Blue Snowmen Table 001  


I set the cover to the cake plate aside & used this round dome to create a "Snow Globe" effect for my centerpiece.


 Jan Icey Blue Snowmen Table 014

  I added dots of snow on the inside as well as snowflakes of icing on the outside.  
In the center, I placed a little snowman that my oldest grandson made for me in pre-school

That little boy is now 17 years old & a 6'3" handsome hunk, but he'll always be my "Precious Angel".  

Yes, I saved this handmade treasure all these years!  "Motherrr, you never throw anything away!"

 The snowman is made out of a white plastic Tylenol bottle, pipe cleaners, pom-poms & has googly eyes.

I surrounded him with *snowball* cookies & white, snow capped cupcakes.  I imagined him ready for a snowball fight!

  Jan Icey Blue Snow Globe


 Jan Icey Blue Snowmen Table 015


The brilliant blue swirled plates are by Luigi Bormioli, found last year at T. J. Maxx.


 Jan Icey Blue Snowmen Table 018  

The silver chargers are from Big Lots...I thought the beaded edge reminded me of snowballs.

Jan Icey Blue Snowmen Table 020


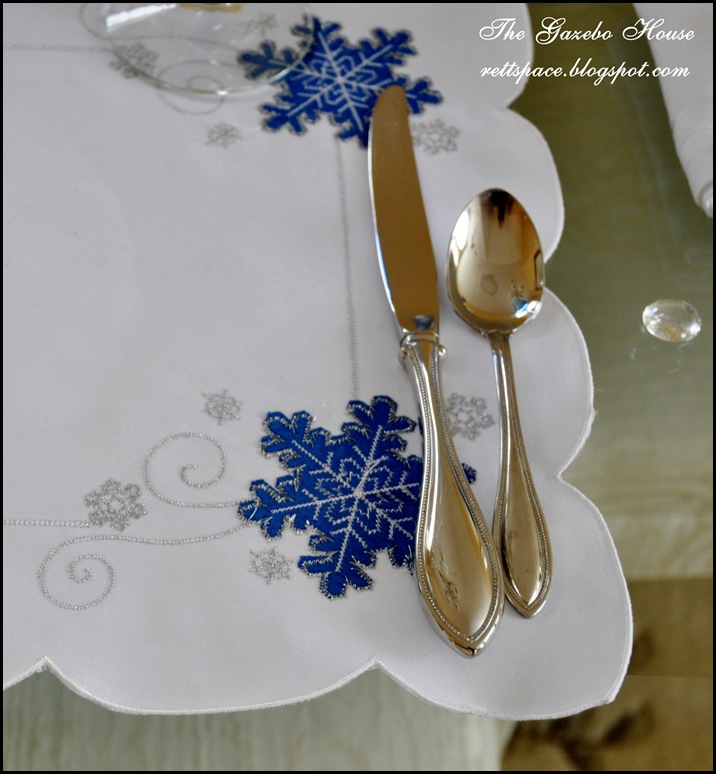
 I used my Oneida "American Harmony" flatware & if you look real close, you can see the beaded border on them that echos the beading around the chargers.
  Jan Icey Blue Snowmen Table 021


Jan Icey Blue Snowmen Table 031


For the bread & butter, I used my Shannon crystal canapes plates, found at Tuesday Morning, last year.  


Jan Icey Blue Snowmen Table 022

The beautiful blue & white & silver placemats are from Big Lots & the other side of them looks just as pretty in all white & silver. 

 I was very impressed with the quality of these! 

 As usual, I'm kicking myself for not buying 12 of them instead of just 8.  Someday I'll learn.  *sigh*


Jan Icey Blue Snowmen Table 023

 The pretty cobalt blue stems are from the Dollar Tree.  Again, I should have bought 24 of these!  ~~sadly shaking my head~~ 

I adore this color & have found a use for them many, many times this year

  Jan Icey Blue Snowmen Table 032


 On the side table, is a Kosta Boda crystal snowball votive candle holder.  These were very popular years ago & it seemed like everyone had them.  It is very heavy & really looks pretty when lit, as you can see.

  I set up a dessert area there, with cups that have a beaded rim, similar to snowballs & snowman plates, spoons & dessert forks.
 Jan Icey Blue Snowmen Table 027
Oh, & a pretty snowflake teapot too!

Jan Icey Blue Snowmen Table 028


Jan Icey Blue Snowmen Table 026


Jan Icey Blue Snowmen Table 025


I hope the sun is shining this winter, where ever you are!
I'm joining Cuisine Kathleen for her
"Lets Dish" party, whose challenge theme
for this time is "Winter" 
I'll also join Yvonne at StoneGable for
Tidbits, Tips & Tutorials
as well as Susan's Between Naps On The Porch
Tablescape Thursday &
  The Tablescaper for her
Seasonal Sunday.

Please stop by each of these blogs & share in the fun!   


Wednesday, January 16, 2013

Snowflakes for Sandy Hook

 Jan Icey Blue Snowmen Table 004

 One month has passed since that horrific day in Sandy Hook, when God called home so many of His little angels.  I have no words to express how sorry we felt, along with the entire world.  We wondered, what could we do, in some small measure, to help to make it better?

Then I heard that when the surviving children returned to a different building for class, their PTA wanted to make their new school seem as welcoming as possible.

People were asked to make snowflakes for the PTA members to hang all over the school, turning it into a magical winter wonderland for the children.

Jan Icey Blue Snowflakes

Classrooms all over the country began cutting out snowflakes, from construction paper & coffee filters...anything white!  If you google "snowflakes for Sandy Hook" you'll be astounded by their contributions.

 Embroidery Library joined in the effort, by giving away three machine embroidery designs to make these special lace heart snowflakes during one weekend.  They are no longer free, but you can purchase them here.
 Jan Icey Blue Snowflakes 2 


Unlike real snowflakes, these are identical except for size...they come in small, medium & large.  Can you see the little hearts in the pattern? I made LOTS of them and sent them off to Sandy Hook.  The PTA received so many donations that they have since asked people to stop sending them now.  They had enough to decorate the entire town.  

"Thank you to everyone who has donated snowflakes on behalf of the children of Sandy Hook  Elementary School and the community of Newtown. We know that each snowflake represents the emotional outreach of the person making it. We have been overwhelmed by the outpouring of generosity from around not just the country but the world. At this time, we have enough beautiful snowflakes to blanket the community of Newtown. Therefore, with regret we must close the snowflake project to further donations. Please take this idea and your snowflakes and create a winter wonderland of your own in your community as a show of solidarity for our Newtown families. Please share your winter wonderlands with us. We would love to share your pictures with the families of Sandy Hook and all the other participating communities. Also please read the message below from the PTA of the Sandy Hook Elementary School for another wonderful way to help. Thank you for your heartfelt and amazing creations and for all of your magnificent notes and kind wishes for the Newtown community."

  I loved them so much, I made a few for myself, as well.  The large one takes over 80 minutes to stitch out    You do them on wash away stabilizer & I could fit several in one hooping on my machine.  You then submerge the stabilizer & snowflakes in warm water until the stabilizer dissolves.

You must leave them lying flat, usually overnight, until they dry but then you are left with these exquisite little lacy treasures.


Stop by The Gazebo House next week to see how I used mine in a Winter tablescape, as a show of solidarity with Sandy Hook & Newtown.  

I'm linking up with Susan at Between Naps on the Porch for Met Monday as well as The Tablescaper for Seasonal Sunday & Yvonne at StoneGable for Tutorials,Tips, Tidbits. 

Sunday, January 13, 2013

Easy~Peasy~Chocolate~Squeezey!!

Choc. covered 6 labeled

 Want a really fast & easy dessert that would be pretty for Valentine's Day?  Or just anytime you need something a little bit fancy in a hurry!

 All I did was take a small handful of chocolate chips, place them in a sandwich baggie & melt them in the microwave for less than 1 minute.  In fact, I checked them every few seconds, smooshing (that's a very technical cooking term)  the chocolate around to help it all melt evenly.
 Choc. covered

Twist the bag down until all of the chocolate is in one corner. 
Cut off a VERY TEENY TINY bit of that corner of the bag &
slowly move the warm stream of chocolate across some
vanilla creme horns from the grocery store. They have the most wonderfully flaky pastry with a rich, sweet filling.  
 
 Choc. covered 2

 We each enjoyed ONE then shared the rest with a neighbor couple & the single guy across the street.  I got them out of the house REAL FAST, but ooooh, they were soooo good!!
  Choc. covered 4

 Easy~Peasy~Chocolate~Squeezey!!
 Choc. covered 5
  
I think I need to practice my squiggling a little more.  I was trying to be too perfect...the wilder, the better in this case, I think!

I'm linking up to Yvonne at StoneGable for On The Menu Monday,
Michael Lee at Rattlebridge Farm for Foodie Friday &
The Tablescaper for her Seasonal Sunday.
 
Come join the fun & see what others are cooking up. 
Thank you ladies for hosting all these wonderfully inspiring memes each week!  


Wednesday, January 09, 2013

Raggie Scarves


  These are the simplest little sewing projects! 
 They make a real fun gift, if you do them up in your child's school colors to wear to football games.

You just cut 2 (or 3) strips of fleece or jersey knit fabric
 however long & wide
you want your scarf to be.
Stack them one on top of the others.
Sew one long seam right down the middle.
I sewed it twice, just for extra strength.
Cut approximately 1" wide slits
 (I use my thumb to measure)
parallel to the stitching
 on both sides,
right up to the stitching line.
You can use regular scissors but I thought
pinking shears gave it some extra fluff.  


Shake it out & you're done! 
I made several for my own grands & then my daughter decided they would be a great project
for Ms. C's class to do at their Halloween Party in the classroom, after they paraded around the school yard.

 Ms. C's entire class (sorry, but I have to blur their faces)

I cut & sewed all the strips of fleece together and my daughter cut all the strips into scarves, done in the colors of the various schools from the Harry Potter series, as a gift to Ms. C's classmates.

  We originally planned for the children to do the cutting of one side only,( we cut up the first side for them)  as a class project, but, sadly,  their little hands weren't strong enough to manage the scissors.   My daughter had blisters on her fingers from all that cutting right there in the classroom that day!


Other ideas would be to make them for her 18" American Girl dolls.  


If you click on the photo below, you will find instructions on how to make them for 18" dolls.

Have FUN sewing up a quick & easy project!
I'm joining Yvonne at StoneGable  for her
 Tutorials, Tips & Tidbits. 

I will also link up with The Tablescaper for her
Seasonal Sundays.
Come join the fun! 

Friday, January 04, 2013

Pork & Sauerkraut for Luck in the New Year!


Pork  and Sauerkraut 003

 We always have pork & sauerkraut for good luck on New Year's day.  When I saw the recent comments on Kitty's Kozy Kitchen blog post about the same food, I was amazed at how many people had never tasted it or never had it served over mashed potatoes.  That is the only way we've ever eaten it! 

 Funny how different regions of our country have their own customs & traditions. (for example, I've never eaten black eyed peas in my life!) I think this recipe is part Polish & part German.  I know my Irish mother never made for us!

I thought I would share how I make mine each year.  There really isn't a specific recipe for making it but it is very easy.  
I buy the sauerkraut in the bag & open it into a colander in the sink & let it sit while I brown the pork, so that some of the salty brine can drain off.  

I then brown a pork roast in a large dutch oven.  Browning adds lots of great flavor!  
I received some wonderful new Penzeys spices for Christmas  & one of them is called "Krakow Nights". 

 I used it on this pork roast as well as in some beef vegetable soup this week & it is delightful.

After the meat is seared, I add the drained sauerkraut to the pan, allowing some of it to cover the top of the meat.  This keeps it moist during cooking.
I also sprinkle a small amount of caraway seeds throughout the pan & I add about 1 1/2 cups of hot water into which I've disolved about a tablespoon of beef soup base.  You could use a few beef bullion cubes instead but I always have the Sam's Club beef soup base on hand.

I don't add any salt, as the soup base & the sauerkraut have plenty & I'm sure the new Krakow Night's seasoning has some in it, too.  

That is it!  Bake in a slow oven (250º-275º) for 2 to 4 hours, depending on how big your pork roast is.  Check it occasionally to make sure the water hasn't evaporated & add more plain water if needed. 

The meat will be tender & practically fall apart when done.     

We serve it over mashed potatoes & have some REAL Horseradish available for those who dare.

Here are some other holiday dishes I made:  


Christmas lantern & snowman 2012 008


Christmas lantern & snowman 2012 014 


Christmas Wreath Appetizer

2 (8 ounce) packages crescent rolls
1 (8 ounce) package cream cheese, softened
1/2 cup sour cream
1 teaspoon dill weed
1/2 teaspoon Italian seasoning
1 teaspoon garlic, minced
1 broccoli (1 small crown chopped into small florets)
3 stalks celery (chopped)
1 sweet red pepper (cut into various shapes)


1 Preheat the oven to 375 degrees F.
2 Remove the crescent roll dough from its packaging BUT DON'T UNROLL IT.
3 Cut each tube into eight slices and arrange the slices in a circle on ungreased baking sheet (about 11 inches in diameter -- you can make your circle on a pizza pan).
4 Bake dough wreath for 15-20 minutes or until the dough turns a lovely golden color. Cool for 5 minutes or so before gently removing wreath to a serving platter. Then, cool it completely.
5 In small bowl, beat the sour cream, cream cheese together until smooth. Mix in dill, Italian seasoning and garlic. Refrigerate until ready to spread on wreath.
6 Cut red pepper into festive shapes (circles, stars, etc.) You can make a bow out of the rounded bottom and strips of the pepper (see the photo for example).
7 When ready to assemble, spread the cheese mixture over the baked wreath.
8 Sprinkle with chopped celery.
9 Arrange broccoli florets, celery leaves and red pepper pieces around the wreath to decorate.
10 Attach red pepper bow and serve.


I'm happy to join in Michael's Lee at Rattlebridge Farm for her Foodie Friday party.
Come see what others are cooking up in the New Year! 
I'll also be joining in Yvonne's fun again at Stonegable for her On The Menu Monday.