Saturday, August 24, 2013

Bridal Shower

5844

Today is the wedding of my husband's granddaughter, Jessica & her fiance, Brian.

While we await the arrival of some of our relatives from Chicago, I thought I might take a minute to share some of the photos at one of Jessica's showers.

splashImage_6

 It was held at Portage Country Club in Akron, Ohio...a very historic building in the Elizabethan style. 

 It is very near to Stan Hywet Hall, where the first AA meetings were held.


IMG_0347

I captured this carved stone logo imbedded in the brick walkway, as I entered the facility.

bridal shower 002

This is the first room beyond the foyer & I'm so in love with this massive fireplace! 

You could almost walk right into it, the opening is so big.  Usually they have a roaring fire going but it was a very warm day in June the afternoon of the shower.

bridal shower 003

Turning left from the fireplace, you enter the bar area where appetizers are frequently served prior to the main event. 
The same fireplace design is repeated on this opposite wall but I think this one is somewhat smaller in scale.

bridal shower 004

The beautifully carved bar has a painted scene of Indians carrying ...or "portaging" their canoes across the Cuyahoga river that runs through the area.  That is where the name "Portage Path" comes from. 

 "Portage" or portaging is the practice of carrying water craft or cargo over land, either around an obstacle in a river, or between two bodies of water.

bridal shower 005

You get a better view of the dental molding across the tops of the fireplaces in this photograph along with some interesting Gothic style wall sconces.

bridal shower 008

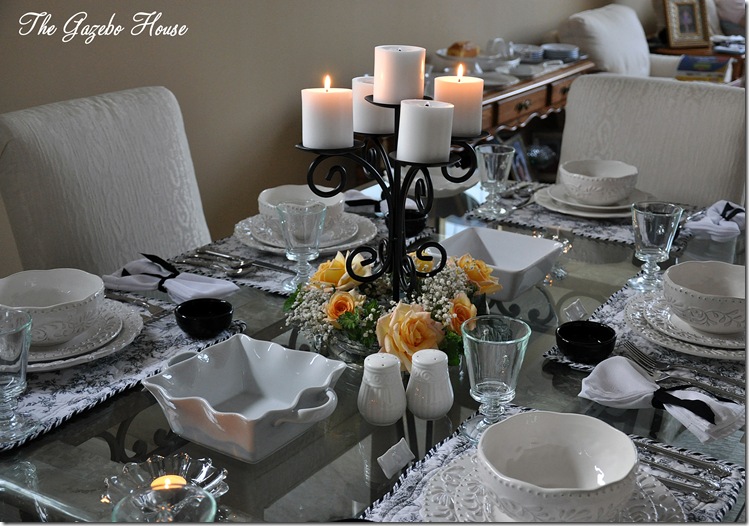
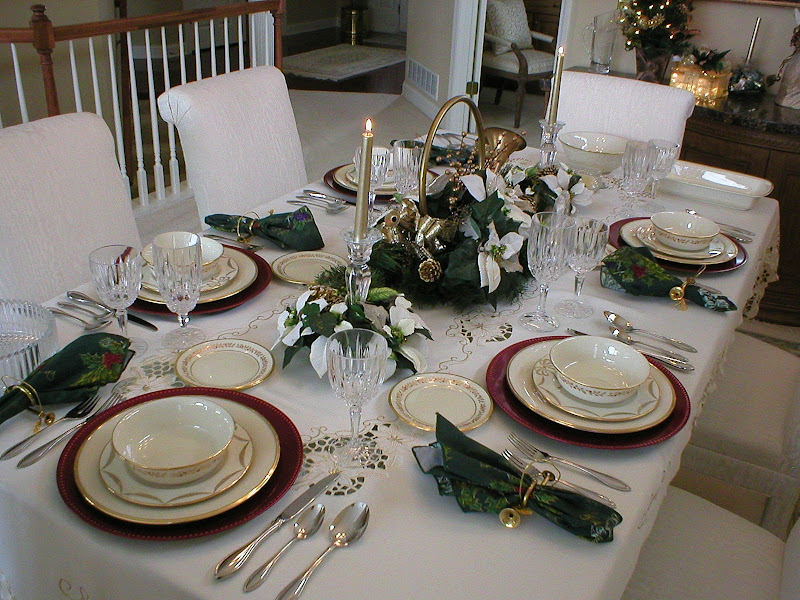
The bridal shower was held in this beautiful room that has an entire wall of windows, on the left, looking out onto the golf course.  It was a glorious day!
 

We've been in this room before, for one of our grandson's First Holy Communion celebrations, seen HERE
Perhaps you will get some ideas or tips from these photos, for a shower in your future.

bridal shower 006

bridal shower 007

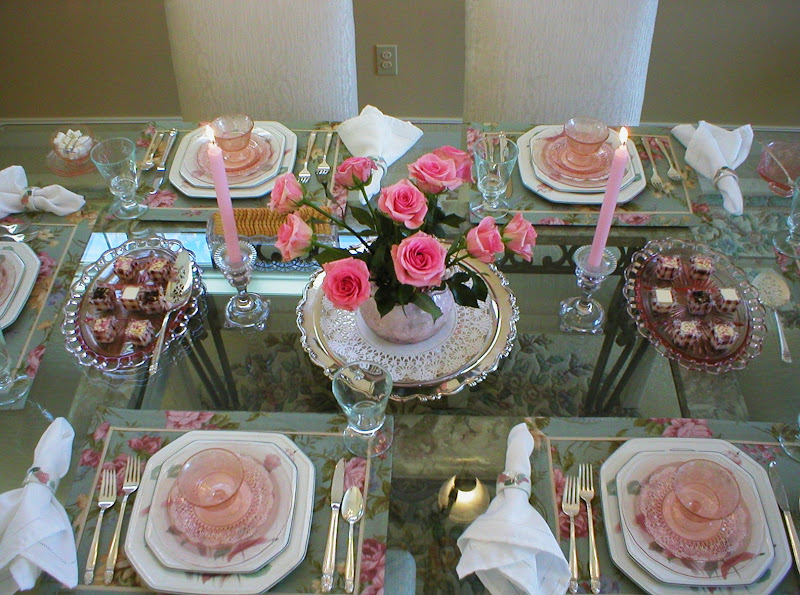
 These are the GORGEOUS fresh flower arrangements that were on every table.  Remember, my daughter-in-love gave me one to take home...you can see how I used it HERE.


bridal shower 010

The favor at each person's spot was wrapped with this elegant black silk ribbon....you KNOW I saved mine!  "Motherrr, you never throw anything away!"

bridal shower 009

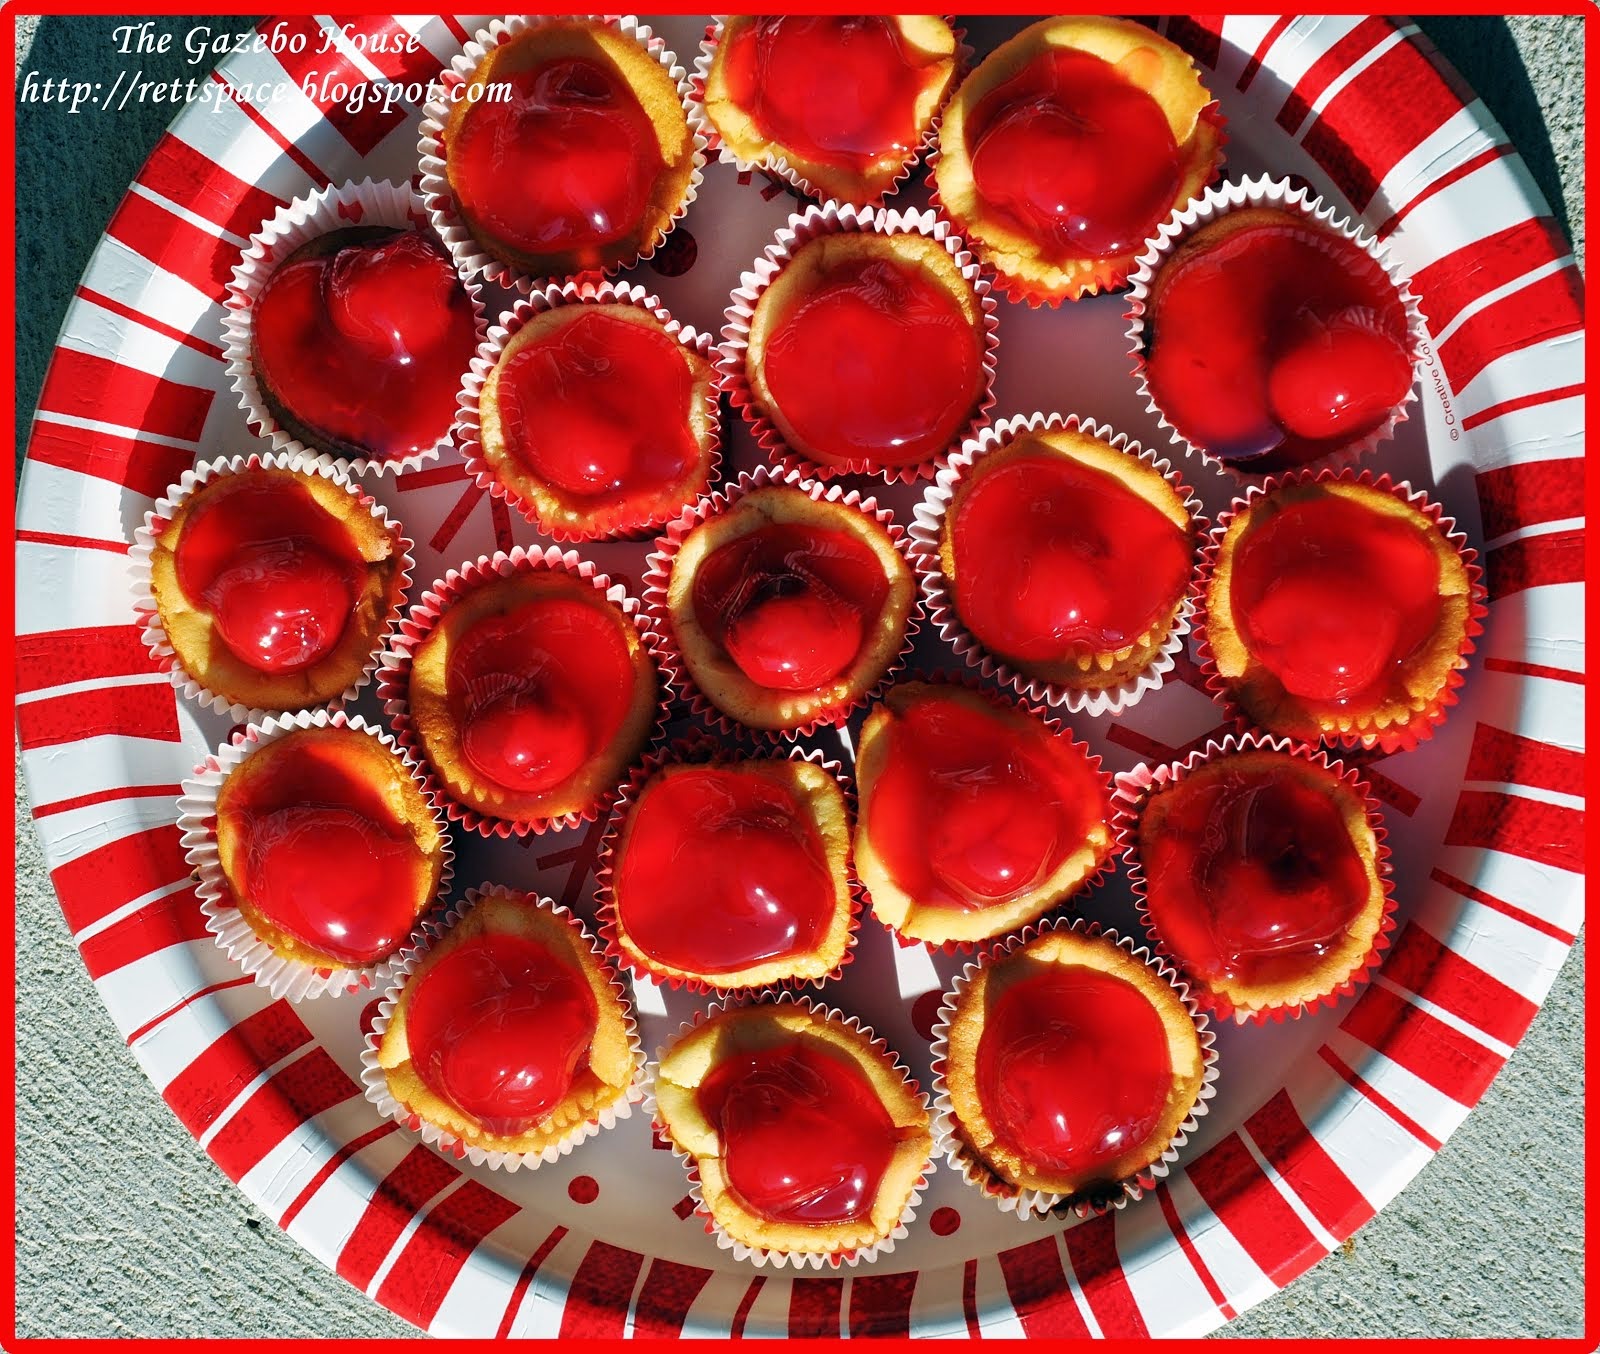
Just look at this decadent assortment of desserts we were served!  I ate the little tart with the fresh fruit on top & brought the other 2 home to my sweetheart.  

bridal shower 022


This is the only photo I feel comfortable sharing, as you know I don't put our grandchildrens photos on the internet anymore.  It does give you a glimpse of the young couple...they are so much fun to be around.  I just adore her choice of a husband...he fits right into the family & brings a lot of laughter to any family event.

Many blessings on both, as they pledge their love to each other today.

I hope I can get some discreet shots of the wedding to share with you later on.


Thanks for stopping by The Gazebo House.
I'm going to link this to Cuisine Kathleen's  Let's Dish.

I'll also join in The Tablescaper's Seasonal Sundays &
Yvonne's Tutorials, Tips & Tidbits on Thursday.


Sunday, August 18, 2013

Indigo Stars Quilt

Indigo Satrs quilt 001

I have spent the heat of the summer, downstairs in the sewing room, where it is nice & cool.
We've had lots of rain here in Ohio...
wouldn't you know it,
 just because we DIDN'T put in a garden this year!
 ~insert rolled eyes~

So instead of being outside, watering & weeding, I've been SEWING!   
Indigo Satrs quilt 005
This quilt , that I'm calling "Oh My Indigo Stars!", just recently came back from the long arm quilter at The Ewe Tree.

Didn't she do a fantastic job on it?
♥♥♥ all her delicate feathering in the light spaces of the stars & the borders.


Indigo Satrs quilt 006

A peek at the back always shows off the quilting beautifully.
 I used a "cross" formation in piecing the backing fabrics...
something our church's "Prayer Quilt" ministry does regularly.
   
Indigo Satrs quilt 008

It is always a struggle for me to find a spot where the lighting will show off the quilting to its best advantage. 
I think this corner, near the sunroom windows, does it the best.

Indigo Satrs quilt 009


Indigo Satrs quilt 010


Indigo Satrs quilt 011

You can always see the quilting better on the back, without the distraction of the piecing.
Thank you, Janice, for doing such a wonderful job!
   
Indigo Satrs quilt 012

 I first saw this quilt on the Fons & Porter television program last year. 
The pattern is called "Indigo Stars" by Karen Witt & uses F&P's "Tri-Recs" ruler
(stands for Triangles & Rectangles) 
for cutting the isosceles* triangles. 

 *That is a triangle with just 2 equal sides, in case, like me, you've forgotten all your high school geometry.

I'm a gadget junky!
(just bought the Hex N More ruler from Polka-Dot Pincushion Quilt Shop)

 Indigo Stars quilt 001

Let me tell you, organization was the key
to completing this puppy!
The quilt block is named
"Fifty-Four Forty or Fight"
and was a way for women to express & voice their
opinions regarding a political issue of their day,
since they didn't yet have the right to vote.
(Can you even imagine???
Go HERE to read more on that subject)
Info from Answers.com says:

"The slogan refers to a dispute between the United States & Great Britain over Oregon Country, which an 1818 treaty allowed both nations to occupy. This was the territory that began at 42º north latitude (the southern boundary of present-day Oregon) & extended north to 54º 40 minutes north latitude (in present-day British Columbia). During the 1830s & early 1840s American expansionists insisted that U.S. rights to the Oregon Country extended north to latitude 54º 40 minutes, which was then the recognized southern boundary of Russian America (roughly present-day Alaska).
The 11th president of the United States, James K. Polk, used the slogan in his campaign.  Polk settled the dispute with Great Britain  & the boundary was set at 49º north, the northern boundary of what is today Washington State & the border between the United States & Canada. This agreement-reached without the fight threatened in the slogan-gave the United States the territory lying between 42º & 49º north latitude & Great Britain the territory between 49º & 54º 40 minutes north latitude as well as Vancouver Island. The United States' portion is present-day Washington, Oregon & Idaho as well as parts of Montana and Wyoming."
Indigo Stars quilt 005

 There are 3 different shades of cream in this quilt. 
 It is the exact same block repeated over & over, but done in different colorways. 
The blocks with the darker blue star points become visually predominant & the ones with the cream points fade into the background.

Indigo Stars quilt 002

I had little "stations" of each color combo set up beside my sewing machine, so as not to confuse them. 

The Tri-Recs ruler is engineered so that it has you cut off a little blunt tip, which aids in lining up the 2 side triangles perfectly every time. 

Indigo Stars quilt 003

See those little squared off corners, below?

 Indigo Stars quilt 007
Indigo Stars quilt 009 sm

When you position the pieces, right sides together, if you make sure to have both fabrics line up on the top & side, as shown below, you are practically guaranteed that all your blocks will be the same size.

Indigo Stars quilt 011

 Ta-Da!!! 
Indigo Stars quilt 013    
These are all of the dark blue star blocks.
I made just as many of the same block, using the cream colors.
   
When you alternate them, the rows will then form this sort of Irish chain effect, as a secondary pattern.

Indigo Stars quilt 006

This was a challenging quilt to make...certainly the most intricate one I have done so far, but I enjoyed it immensely.

  It was like a giant puzzle & it went together beautifully.

I'm thinking about doing another one,
only in RED & TAN.
   I ♥ RED!


Indigo Stars quilt 009


Indigo Stars quilt 012

I had the quilt draped over the stairway railing for a the patriotic holidays, but have since blocked it, so it would lay perfectly flat.
To do that, you need to:    

Spread a clean flat sheet out to prevent your quilt top from picking up dust or hair.             

Spread the quilt top on top of the sheet.             

Pull and tug at the edges of the quilt until it is as flat as you can make it.             

Dampen the quilt top thoroughly using a spray bottle filled with water.             

Measure the sides of the quilt. If the quilt is a square, the sides should be equal, and if the quilt is a rectangle, the sides parallel to each other should be equal. This helps you see where the quilt needs to be adjusted.             

Tug or push in the areas where the quilt top needs to be adjusted. The water helps the fabric hold its shape.             

Pin down the edges of the quilt using T-pins, working from side to side. For example, if you pin down one spot on the quilt, get up and go to the other side of the quilt to pin the spot across from it.             

Leave the pins in place and allow the quilt top to dry.

 It is on still on top of the sheet, on the floor of the sewing room, waiting entry into our local quilt show.  The grandkidlets are forbidden to go near it until after the show!  LOL


Indigo Stars quilt 015


I'm joining The Tablescaper for her Seasonal Sundays party as well as Susan's Metamorphosis Monday at Between Naps on the Porch & Yvonne's StoneGable for Tutorials, Tips & Tidbits on Thursday.  Won't you follow me over there to see what other bloggers have been making?  Lots of wonderful inspiration available for FREE!

Thanks for stopping by The Gazebo House today.  I love it when you visit me.

fondly,
Rett

Saturday, August 10, 2013

Despicable ME!


Minions! 010 

 Aren't these just the cutest little cuppies?? 

I saw them on www.mylitter.com & instantly fell in love!

Minions! 001

 They're really easy to do!  
Just cut Twinkies in half & place on a cookie sheet with room between so you can decorate them with Wilton's black sparkle gel icing & candy eyes.  
I found both at JoAnn's.

Borrowing Tiffany's image of what you'll need,
 because I opened my packages
before I thought to take a photo...
Duh?


Minions! 002

I did mine a little different than she did.  
I made a straight line across, from one side to the other, 
then add 2 bigger blobs of icing in the center.

Press a candy eye into each of the blobs & 
the black will ooze up around the eye...
looks just like glasses, huh?


Minions! 003

 I got a little carried away with trying to make lips on this one above.  She looks like she is having a stroke, with one pupil dilated & one constricted plus a droopy mouth!
(sorry, once a nurse, always a nurse) 

Minions! 005

When you have all the heads completed, 
just press them down  into an upright position,
onto your pre-iced cupcakes.  

I added an extra circle of icing around
 the base to hold them steady, in place.

Minions! 006

At the very last minute, I remembered 
that there were one-eyed Minions, too!  
Yikes...Almost forgot!!


Minions! 009

My husband laughed out loud when he saw them all lined up on the table.  Then he asked if I had run out of candy eyeballs.  I laughed then...He obviously has not seen the movie!  

My grandkidlets have been away at camp all week,
so I'm taking these over to them tonight,
as a "Welcome Home" treat.
I missed those little buggers!!

I'm linking to Michael Lee's Foodie Friday, Susan's Metamorphosis Monday,  Yvonne's Tutorials, Tips & Tidbits & The Tablescaper's Seasonal Sunday parties.  Do stop by & see what others are creating...you'll be inspired, just like I was!

Thanks for stopping by!  
I'm going shopping for a new computer on Monday morning...wish me luck on finding something that my printer/scanner & camera will play with nicely!!

fondly,
Rett


Thursday, August 08, 2013

More LEMON LOVE!!

  lemon table 007
  lemon table 004
lemon table 010

 I'm having MEGA computer issues...in fact, my desktop is still at the repair shop, where it has been all week.

I am limping along on my ancient & very S-L-O-W laptop, so everything takes twice as long.


lemon table 006

 Luckily, I had saved this post in draft mode!
Instead of happy banter & my usual chatter, I'll just give you the bare bones specifics, if you don't mind.
 lemon table 008

 Lemon placemats are from Tuesday Morning, last year.
Lemon dishes are from Pier One, also last year, along with
the wicker chargers.
Water decanter (subbing as a vase today) is from Big Lots.
Pretty yellow coasters are from Dollar Tree, last month along with the fun lemon glassware.
 lemon table 009

 lemon table 021
Keeping food cold while dining outside in the gazebo is imperative in the summer heat.
I found these mini ice chests that have a deep space in the bottom to hold ice & a tray
that fits snugly into the top.  It has 3 divisions to hold different fruits or toppings.


lemon table 002


lemon table 003


lemon table 011

The lemon yellow begonias outside the gazebo cooperated & are blooming their little heads off!
 lemon table 013


lemon table 014

Cherry/Blueberry muffins with an extra dusting of sanding sugar after baking were yummy!

lemon table 015


lemon table 016


lemon table 017


lemon table 019

 I'm joining Cuisine Kathleen for Let's Dish,
Yvonne, at StoneGable for Tutorials, Tips & Tidbits
Susan at Between Naps on the Porch for Tablescape Thursday &
The Tablescaper for Seasonal Sundays.

Hopefully, I'll be back to normal by the weekend & then I'll try to visit everyone!

Thanks for stopping by The Gazebo House today.
Would you like a glass of lemonade before you go?

lemon table 020